Activating the sound file mode is extremely simple.
|
Create a new blank virtual medium |
The special blank for the sound file mode can be created using the Virtual CD Starter. Begin by selecting the Insert virtual blank option.

|
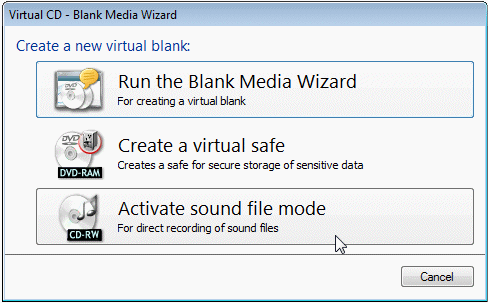
Select type of blank |
Since we will be creating sound files, we select the Activate sound file mode option.
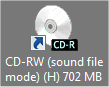
After a moment, the sound file mode is active. This is indicated by the label on the icon, visible for example when you are using dynamic desktop icons.
|
- Dynamic desktop icon for a virtual burner with active sound file mode. |
You can now begin burning audio data. It is important to understand how Virtual CD will name these files. Track titles can be taken from CD-Text or from an M3U playlist.
You can now create sound files using any program that can burn audio data. The following two examples provide detailed demonstrations:
| • | Burning with iTunes: shows how to burn using a program with CD-Text. |
| • | Burning with the media player: shows how to burn using an M3U playlist. |
|
You can also use the sound file mode without CD-Text or an M3U playlist. The main problem with this would be that the sound files are not given meaningful names. |
|
If you use a program that enables the addition of CD-Text information when burning a CD, we recommend using that function. It names the files automatically, which is far easier that having to enter all the titles yourself. |