The following describes how to burn a data CD in just a few easy steps, using the CD-burning function integrated in the Windows 7 Explorer. The procedure is similar to that required for Windows Vista; some of the designations are different.
|
Create new blank |
Open the menu of the Quick Start utility and use the mechanism for direct creation of a virtual blank to create a blank DVD-R. (Select <Virtual burner> -> Insert virtual blank -> DVD+-R(W) -> DVD-R.)
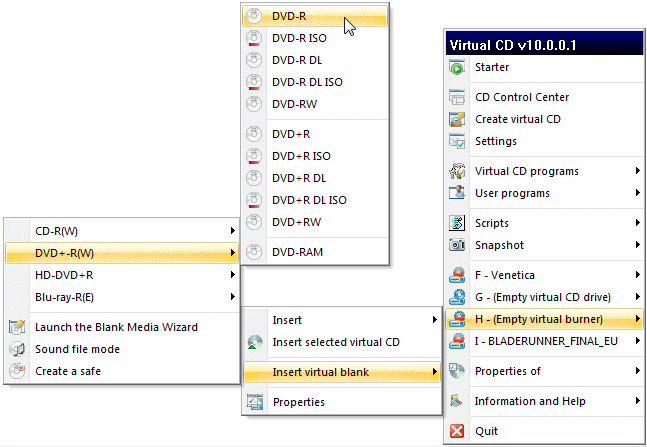
Once the virtual blank has been created, it is automatically inserted in the selected virtual burner.
|
Select an action |
After the blank is inserted in the virtual CD burner, the Windows autoplay function opens the a dialog for a blank DVD. Select Burn files to disc.

|
Select output format |
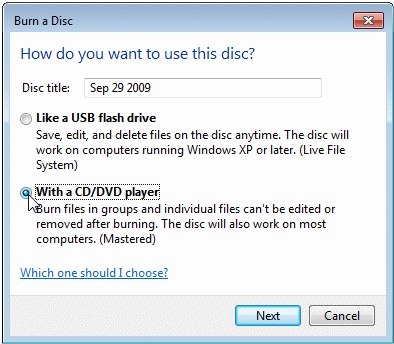
This opens the Burn a Disc dialog; this is where you can select the file system to be used. Since we want to create a finalized disc, we select With a CD/DVD player.
|
If you use Windows Vista, select Show formatting options to expand the display of settings, and then select Mastered. |
Click on Next to continue.
|
Start the burning process |
Now another Explorer window opens, with the virtual CD burner as address. You can use drag and drop to add your choice of files here. Once you have added all the files you wish to burn onto the medium, click on Burn to disc to start burning.
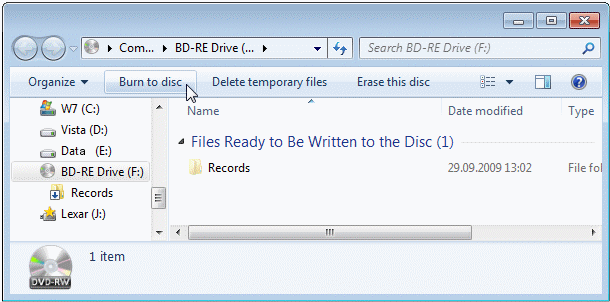
Follow the instructions given in the Wizard, enter a name for the media title, and click on Finish to complete the process.
That's it! Now you can insert the virtual CD and check whether the results meet your expectations.