The procedure for sharing virtual CDs is very simple. A step-by-step description follows.
|
Insert a virtual CD |
If you do not have any virtual CDs, please create one now and insert it.
|
During the process of creating a virtual CD, the Image Wizard lets you define a number of properties for the virtual CD, (such as start program, keyboard shortcut, etc.). Many of the settings available here will have no effect when the virtual CD is run from a share rather than from a virtual drive on a workstation. If you define a keyboard shortcut, however, you can use it to insert the virtual CD when you are working at the file server console. |
Insert the virtual CD you wish to publish over the file server into a virtual drive. If a program starts automatically when the CD is detected, it shuts down again.
|
Share the inserted virtual CD |
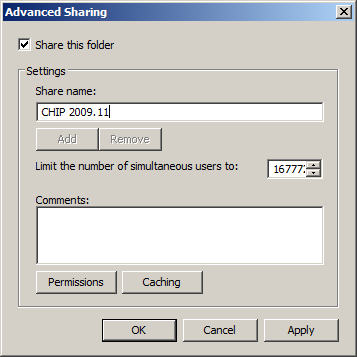
To publish the contents of the CD in your network, right-click on the drive and select Properties. On the Share page of this dialog, select Advanced sharing. Then select the Share this folder option and, in the Share name field, enter the description to be used when addressing the virtual CD drive as a share.
|
The share name is not entirely user-definable. Enter a meaningful description that conveys information about what can be accessed under that share. |
Click on OK to close this dialog and activate the share.
|
Test access to the share |
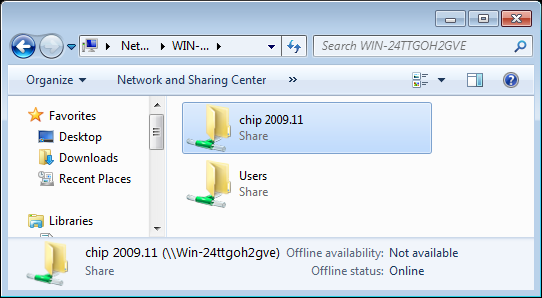
This CD content is now available to all workstations in the network, and can be accessed in the share you have defined. Here is an example, showing a Windows 7 workstation:
That's it! - You have created your first virtual CD share for publication over the Virtual CD file server.